Introduction
This article is a follow-up on the previous bare metal Kubernetes cluster deployment article.
We'll be briefly discussing the Kubernetes network model, and offer a solution to expose public HTTP/HTTPS services from your cluster, complete with automatic SSL certificate generation using Letsencrypt.
We assume you have a working cluster or single-node instance as well as a working kubectl client with administrative access.
About kubectl
The standard Kubernetes API client is the command line kubectl tool.
You may have noticed there are multiple ways to interact with your Kubernetes cluster through kubectl.
You can use it in a very similar way you would use the docker command as in kubectl run, kubectl expose, kubectl attach, and more.
These commands are very useful to run a container you need to check another service (a MySQL client container for instance), check logs for pod, attach the console, ...
However when it comes to actually create, modify and delete cluster resources, the Kubernetes documentation will speak of three different approaches:
- Imperative commands — Akin to using docker commands;
- Imperative object configuration — Using yaml files to describe resources but specifying what to do (creating, deleting, modifying);
- Declarative object configuration — Using kubectl apply to apply the differences from what is currently running on the cluster as compared to the provided yaml file.
We mostly use the third approach. We will be talking about "applying" modifications a lot, this implies using kubectl apply -f <SOME_YAML_FILE> even if we're not giving out that full command so please keep that in mind while reading the rest of the article.
While we're at it, you will also want to know about:
- kubectl diff -f <YAML_FILE> — Informs you about the changes that applying this file would generate;
- kubectl delete -f <YAML_FILE> — Deletes all the resources mentioned in the yaml file (be careful when using this one).
You should also group cluster resources in meaningful namespaces. We mostly use the default namespace in this article for convenience.
Exposing services
The concept of pods, which are basically groups of container, also extends networking to the point of having all the containers in pod being able to reach each others via localhost. They actually share the same IP address from the pod network range.
However, other than that facilitation of networking between containers of the same pod, other pods can communicate with one another using their pod IP address, which is routable from any node (including the master node).
Ports exposed as containerPort entries in deployment objects will be opened on that pod IP address.
For instance, let's say I have a Nginx server deployment with containerPort 80 open, I can grab the pod IP and contact the Nginx container from one of the node (or one of the other pods of the cluster):
$ kubectl get pod -o wide
NAME                          READY   STATUS    RESTARTS   AGE     IP           NODE
nginx-test-8599676b58-znhnp   1/1     Running   0          4m36s   10.244.1.2   king-crab-2
The service is available at that pod IP:
$ curl 10.244.1.2:80
<!DOCTYPE html>
<html>
<head>
<title>Welcome to nginx!</title>
<style>
    body {
        width: 35em;
        margin: 0 auto;
        font-family: Tahoma, Verdana, Arial, sans-serif;
    }
</style>
</head>
<body>
<h1>Welcome to nginx!</h1>
...
</body>
</html>
You may have foreseen a slight issue with having pods contacting each other through their internal pod IP address: that IP address can and will change when the pod is re-created (could also happen when a future deploy updates the pod) ans is thus not a good way to reliably reach a given pod.
Within Kubernetes, this is solved by a class of objects called Services.
If you're familiar with docker expose, services are similar. Actually you can use kubectl expose to create them, but we tend to prefer using configuration files to apply changes to the cluster because it makes it much easier to track changes and know what is currently running, among other things.
Here is a deployment for our simple Nginx container test with the service object declaration at the end.
apiVersion: apps/v1
kind: Deployment
metadata:
  name: nginx-test
spec:
  selector:
    matchLabels:
      app: nginx-test
  replicas: 1
  template:
    metadata:
      labels:
        app: nginx-test
    spec:
      containers:
      - name: nginx
        image: nginx:latest
        ports:
        - containerPort: 80
---
kind: Service
apiVersion: v1
metadata:
  name: nginx-service
spec:
  selector:
    app: nginx-test
  ports:
  - protocol: TCP
    port: 8081
    targetPort: 80
With this simple service declaration, we're reserving a service IP address (still on the Kubernetes internal network) that will bind port 8081 in this case (see the port configuration item) and connect it to actual port 80 of the nginx-test pod deployed earlier (first part of the description file).
Now that service IP address will be more stable than pod IP addresses as it will be retained when pods are created, but it's still not a silver bullet as the IP address of the service could still change if you had to wipe everything out and re-create for some reason.
The good news is that kubeadm has also installed a small DNS service for us with a Service already attached to it. You should be able to find its service IP using:
kubectl get service --all-namespaces
Now if we use nslookup interactively and connect to the DNS IP address, and resolve our service IP address by typing in the domain name nginx-service.default.svc.cluster.local:
$ nslookup
> server 10.96.0.10
Default server: 10.96.0.10
Address: 10.96.0.10#53
> nginx-service.default.svc.cluster.local
Server:         10.96.0.10
Address:        10.96.0.10#53

Name:   nginx-service.default.svc.cluster.local
Address: 10.110.85.176
>
The DNS service can be customized, but by default will use a format as in <SERVICE_NAME>.<NAMESPACE>.svc.cluster.local.
All pods are naturally able to resolve addresses using the internal DNS and can even use short names, like nginx-service in our case.
Exposing a public service
We covered communication between pods but we still have not touched any actual way to expose something to the outside internet. Doing so still uses service objects, but we need to specify an adequate service type.
Large cloud providers will give you access to the service type LoadBalancer, which can trigger the creation of a provider-specific load balancing appliance with a public IP address and possibly more parameters to access your service.
We don't provide support for the LoadBalancer service type, and there's a good chance you won't either if you're deploying a bare metal cluster.
This leaves us with one service type remaining: NodePort.
Service type NodePort will make all nodes in the cluster (including the master node) bind a given userspace port (starting at 31000) to a service.
If your nodes have public IP addresses, this effectively makes the service publicly available (provided it's not firewalled), although on a strange port.
In our case our nodes are configured from the start with no public IP address. But we can still access the service from the private network.
Let's modify the service we created before by using kubectl apply -f on the following yaml file:
kind: Service
apiVersion: v1
metadata:
  name: nginx-service
spec:
  selector:
    app: nginx-test
  type: NodePort
  ports:
  - protocol: TCP
    port: 8081
    targetPort: 80
    nodePort: 31888
Our pod is still exposing port 8081 internally, but now it's also available on all nodes at port 31888.
We're still not exposing anything to the Internet, but we're getting closer to an actual way to do it.
The easiest thing you could do at this stage is setting up HAProxy or Nginx (or Varnish, Apache, whatever you'd rather have) with one or more public IP addresses, and have it load balance the traffic between your pool of nodes, from which you can remove the master node as it's never going to run our deployment pods and so will always have to route traffic away.
For instance, we could use HAproxy with a configuration file similar to the following:
frontend kube-http
        bind *:80
        mode tcp
        option tcplog
        timeout client 1m
        default_backend http-backend

backend http-backend
        mode tcp
        option tcplog
        option log-health-checks
        option redispatch
        log global
        balance roundrobin
        timeout connect 10s
        timeout server 1m
        server node2 <NODE2_IP>:31888 check
        server node3 <NODE3_IP>:31888 check
        server node4 <NODE4_IP>:31888 check
HAProxy will automatically check for host health and evict possible dead nodes from its load balancing logic. This is a very simple example using TCP load balancing for port 80 but you could do HTTP or HTTPS load balancing as well.
Using Kubernetes Ingress
The NodePort service type is helping, especially if you don't have many pods that have to be accessed from the outside. But what if you're running many pods exposing various types of REST APIs, plus a few blogs and sites?
Having different node ports for all these services and somehow tying it all up at the public proxy level will require a lot of configuration.
Fortunately there is the concept of "ingress" in Kubernetes, which is specific to HTTP and HTTPS only. The goal is to offer an easy way to configure all the standard HTTP hurdle like domain name based virtual hosting and SSL through a new object/resource kind called "Ingress", that ties in to Services.
Adding Ingress objects tied to services has absolutely no effect unless an ingress-controller exists in your cluster.
The Ingress Controller, once deployed, should scan and process Ingress objects for you automatically.
For our needs we're going to deploy the Nginx Ingress Controller. As far as we know there are two projects called ingress-nginx, one maintained by Google and the Kubernetes core team, and the other by Nginx. We're going to use the one from the Kubernetes project here.
At the moment, we can do all the service accounts and container deployment by applying this file from the Github repository (check it out for the latest deploy information):
kubectl apply -f https://raw.githubusercontent.com/kubernetes/ingress-nginx/master/deploy/mandatory.yaml
You should now have a new namespace called ingress-nginx and one or more pods running in that namespace:
$ kubectl get namespaces
NAME            STATUS   AGE
default         Active   26h
ingress-nginx   Active   42m
kube-public     Active   26h
kube-system     Active   26h
$ kubectl get pod --namespace ingress-nginx
NAME                                        READY   STATUS    RESTARTS   AGE
nginx-ingress-controller-565dfd6dff-fj7z9   1/1     Running   0          42m
$
The Ingress deployment will only have one replica by default, because that's how it's configured in the yaml file we applied earlier from Github. We can imperatively scale it to two like so:
kubectl scale deployment/nginx-ingress-controller -n ingress-nginx --replicas=2
Of course we could've altered the yaml file to add more replicas and applied that file to achieve the same result.
You could also setup a Horizontal Pod Autoscaler object, which would automatically deploy new replicas in regard to a resource usage rule you'll have to configure. Auto-scaling is out of the scope of the current article, though.
The next step is just to expose the HTTP and HTTPS port from that pod to the outside world. We're going to use two node ports for that, and TCP load-balance these with our front HAProxy server.
Create the following service entry:
apiVersion: v1
kind: Service
metadata:
  name: ingress-nginx
  namespace: ingress-nginx
  labels:
    app.kubernetes.io/name: ingress-nginx
    app.kubernetes.io/part-of: ingress-nginx
spec:
  type: NodePort
  ports:
    - name: http
      port: 80
      targetPort: 80
      nodePort: 31080
      protocol: TCP
    - name: https
      port: 443
      targetPort: 443
      nodePort: 31443
      protocol: TCP
  selector:
    app.kubernetes.io/name: ingress-nginx
    app.kubernetes.io/part-of: ingress-nginx
Where we bind ports 31080 and 31443 on all nodes to the Ingress Controller.
Now you just need to configure HAProxy to TCP load balance both ports 80 and 443 to all nodes (except the master) on their respective corresponding ports 31080 and 31443. We're not going to show how to do that here but there is an example HAProxy TCP load balancing configuration for port 80 in the previous section. We're basically doing that but with two different TCP ports instead of just port 80.
With two nginx-ingress replicas we would have a flow similar to what is illustrated below:

Even if HAProxy hits the node with no nginx-ingress pod on it, it will be routed to one that has it through pod networking.
Let's see if it works. If you still have our previous nginx-test deployment, we're going to modify its corresponding Service to use Ingress because we no longer need the NodePort we configured before. But it doesn't matter what state the service is in on your platform, you can always apply the change anyway.
kind: Service
apiVersion: v1
metadata:
  name: nginx-service
spec:
  selector:
    app: nginx-test
  ports:
  - protocol: TCP
    port: 80
    targetPort: 80
Now let's say I want my service to be available on domain name testservice.net7.be and I have already added the DNS entry to make it resolve to my HAProxy load balancer.
We're going to apply the following file:
apiVersion: extensions/v1beta1
kind: Ingress
metadata:
  name: test-ingress
spec:
  rules:
  - host: testservice.net7.be
    http:
      paths:
      - backend:
          serviceName: nginx-service
          servicePort: 80
Do note the domain name set at the "host" key and the serviceName and port mentioned in the backend section.
Don't forget to also name your Ingress resource to make it easier to update later on. By the way, you can group more than one hostname to service definition in a single Ingress resource and you should if it logically makes sense and/or concerns the same application.
Once the Ingress resource has been created, it will now bind our test Nginx container to the configured domain name.
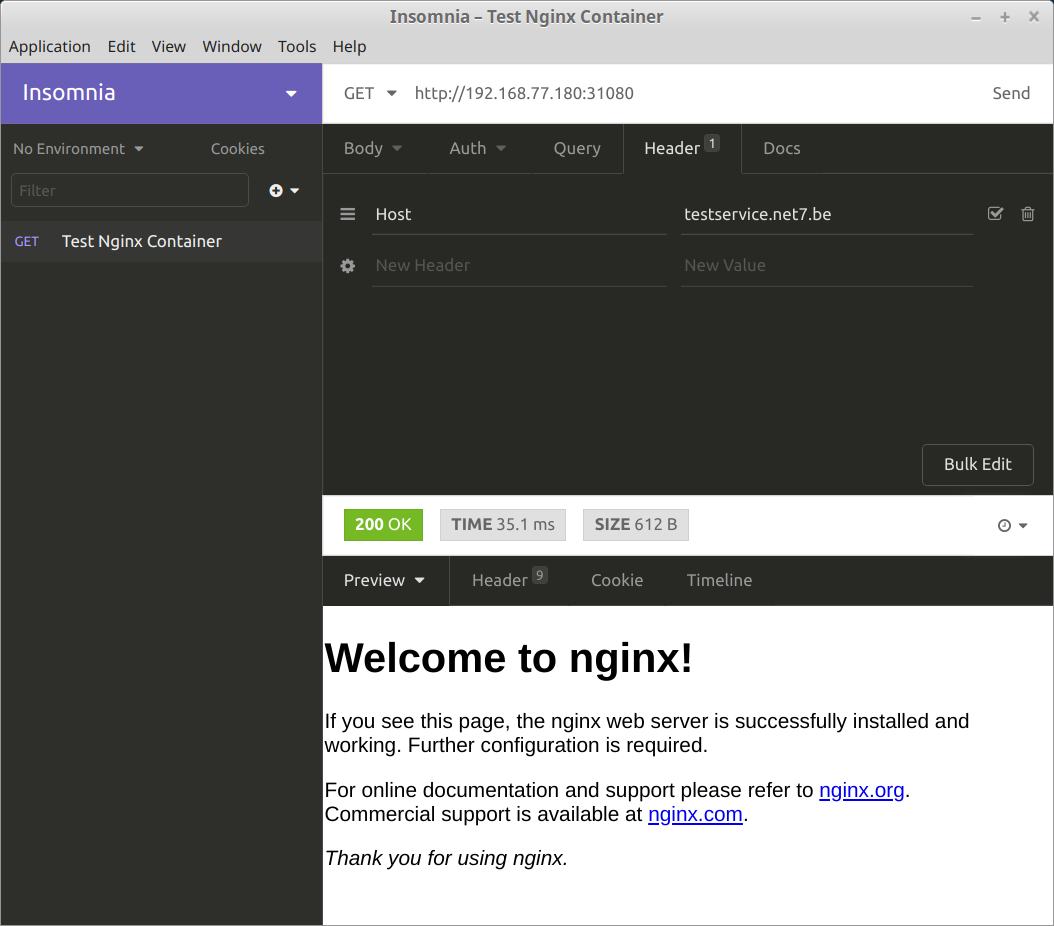
You can still test this without any DNS modifications and with no front load balancer involved by calling one of the node on port 31080 and manually setting the Host HTTP header on your HTTP client as shown here with Insomnia:
If you were to remove the Host header, the Ingress controller would give you a 404 because it currently doesn't have any Ingress resource corresponding to a plain request like that.
Ingress resources allow you to setup SSL redirects and more general URL rewriting, as well as binding specific URL paths to a Service - Please refer to the official documentation for more in depth configuration of your HTTP needs.
Enabling the proxy protocol
If you look at the logs of your Ingress controller, you'll see that it's showing an internal cluster IP address as the client IP address.
Even if we could somehow get the upstream IP address here, it would still not be the client IP address because we're using a TCP load balancer and hence would see the IP address of the load balancer.
Enters the proxy protocol: the proxy protocol was created by the HAProxy team to add a layer on top of TCP load balancing and facilitate keeping the client IP address. Many cloud proxies support this protocol as well as an option, and most servers also support it.
Nginx has to be made aware of it through configuration.
If you created the ingress-nginx controller as described in this article, the first yaml file you apply creates a configMap object called nginx-configuration. We're going to modify that configMap.
You can find the names of the ingress-nginx config map with such a query (replace the namespace accordingly if using a different one):
kubectl get configmap --namespace ingress-nginx
Let's apply the configuration option:
kind: ConfigMap
apiVersion: v1
metadata:
  name: nginx-configuration
  namespace: ingress-nginx
  labels:
    app.kubernetes.io/name: ingress-nginx
    app.kubernetes.io/part-of: ingress-nginx
data:
  use-proxy-protocol: "true"
The Ingress controller now expects the proxy protocol, but our load balancer is not using it (at least mine is not).
We need to change the server entries so that they use the proxy protocol. Here is an example configuration for HAProxy for 2 nodes, with proxy protocol enabled and both HTTP and HTTPS TCP load balancing:
frontend kube-ssl
  bind *:443
  mode tcp
  option tcplog
  timeout client 1m
  default_backend ssl-backend

frontend kube-http
  bind *:80
  mode tcp
  option tcplog
  timeout client 1m
  default_backend http-backend

backend ssl-backend
  mode tcp
  option tcplog
  option log-health-checks
  option redispatch
  log global
  balance roundrobin
  timeout connect 10s
  timeout server 1m
  server node1 <NODE1_IP>:31443 check-send-proxy inter 10s send-proxy
  server node2 <NODE2_IP>:31443 check-send-proxy inter 10s send-proxy

backend http-backend
  mode tcp
  option tcplog
  option log-health-checks
  option redispatch
  log global
  balance roundrobin
  timeout connect 10s
  timeout server 1m
  server node1 <NODE1_IP>:31080 check-send-proxy inter 10s send-proxy
  server node2 <NODE2_IP>:31080 check-send-proxy inter 10s send-proxy
Reload haproxy to apply the new configuration.
To check that you do get the right source IP address, you can read the output of the Ingress controller directly.
$  kubectl get pod --namespace=ingress-nginx
NAME                                        READY   STATUS    RESTARTS   AGE
nginx-ingress-controller-565dfd6dff-fj7z9   1/1     Running   0          45h

$  kubectl logs -f nginx-ingress-controller-565dfd6dff-fj7z9 --namespace ingress-nginx
Just adjust the namespace if your Ingress controller is on a different one.
Automatic SSL Support
What if there was a way to automatically request certificates for your services exposed by Ingress resources using Letsencrypt?
The current way to achieve this would be to deploy a special container called cert-manager.
We will then configure cert-manager to use Letsencrypt to request certficiates and renew them automatically.
First let's create the deployment for cert-manager. You can find the deployment files on their Github repository.
kubectl apply -f https://raw.githubusercontent.com/jetstack/cert-manager/master/deploy/manifests/00-crds.yaml
kubectl apply -f https://raw.githubusercontent.com/jetstack/cert-manager/master/deploy/manifests/01-namespace.yaml
kubectl apply -f https://raw.githubusercontent.com/jetstack/cert-manager/master/deploy/manifests/cert-manager.yaml
The next step is to create Issuer objects for Letsencrypt. There are two kinds of issuers:
- Issuer - Can only request certificate for the namespace this issuer belongs to (will be "default" if no namespace is provided).
- ClusterIssuer - Can request certificates for any namespaces.
To have an easier time, we're setting up ClusterIssuers.
The Letsencrypt project has a "staging" certification engine which does not have the somewhat drastic rate-limiting that the production engine has.
If you're not super certain of your certification process you might want to sometimes test with staging certificates. We will thus create two ClusterIssuers, one for staging and one for production:
apiVersion: certmanager.k8s.io/v1alpha1
kind: ClusterIssuer
metadata:
  name: letsencrypt-staging
spec:
  acme:
    email: <YOUR_EMAIL>
    http01: {}
    privateKeySecretRef:
      key: ""
      name: letsencrypt-staging
    server: https://acme-staging-v02.api.letsencrypt.org/directory
---
apiVersion: certmanager.k8s.io/v1alpha1
kind: ClusterIssuer
metadata:
  name: letsencrypt-prod
spec:
  acme:
    email: <YOUR_EMAIL>
    http01: {}
    privateKeySecretRef:
      key: ""
      name: letsencrypt-prod
    server: https://acme-v02.api.letsencrypt.org/directory
Do note that these issuers are configured to use HTTP challenge to confirm certificate validity. Letsencrypt also allows DNS verification, which you can setup to use your Kubernetes DNS service. In our case we want to use HTTP challenges, but for a big cluster you might want to look into the DNS verificiation.
You should enter a valid email address for possible renewal warnings in lieu of the placeholder <YOUR_EMAIL>.
Once the issuers have been created, we can now modify our previous "test-ingress" service for two things:
- SSL encryption on the single domain testservice.net7.be;
- Automatic redirection of HTTP to HTTPS, including the HSTS header.
Here's the yaml file to apply:
apiVersion: extensions/v1beta1
kind: Ingress
metadata:
  name: test-ingress
  annotations:
    ingress.kubernetes.io/ssl-redirect: "true"
    kubernetes.io/tls-acme: "true"
    certmanager.k8s.io/cluster-issuer: letsencrypt-prod
    kubernetes.io/ingress.class: "nginx"
spec:
  tls:
  - hosts:
    - testservice.net7.be
    secretName: test-certificate-1
  rules:
  - host: testservice.net7.be
    http:
      paths:
      - backend:
          serviceName: nginx-service
          servicePort: 80
Where test-certificate-1 will be the name of the created certificate, as a Kubernetes "certificate" class of objects. You should give your certificates easily identifiable names.
We referenced the production issuer at the certmanager.k8s.io/cluster-issuer key, so this will request a valid, production certificate.
Of course the certificate validation requires TCP load balancing to be working and the domain name to be valid and resolving to the load balancer or the HTTP verification will fail.
To see if the challenge completed successfully, we can describe the Ingress resource:
kubectl describe ingress test-ingress
Recent events should mention the certificate request.
When the certificate is created you can also see it in the certificate list (provide the right namespace if needed):
kubectl get certificate
You now have everything needed to easily expose HTTPS-enabled services running on your bare metal Kubernetes cluster.