Introduction
Static assets bundlers, also sometimes called "module bundlers" serve multiple purposes very interesting to modern web applications.
Most of them are part of the JavaScript ecosystem and run through Node.JS.
It can be daunting for some backend developpers from the pre-Node era to actually add one of these to their projects even though the gains are always substantial.
In this article, we'll try to present a way to easily add module bundling to a practical backend project setting using the 0-configuration bundler Parcel.js.
We picked Spring Boot (Java) and .NET Core (C#) to serve as examples.
Why using a module bundler?
They serve a few main goals:
- Allow using CommonJS or JS Modules to split your JS codebase to multiple files and use the Node package manager to install and import external libraries
- Bundle and minify all your JS (and CSS) code into one or a few files
Having a limited amount of script and CSS link tag imports and external resources in general will speed up your page loads by reducing the amount of necessary HTTP GET requests, and even more so considering these assets will also be minified by the bundler to have the smallest possible footprint.
That is still true in a world where HTTP/2 becomes more generalized. HTTP/2 does help a lot with diminishing the impact of having a lot of small file requests since it can pipeline all of them in the same connection and multiplex the whole thing.
Still, even with HTTP/2 module bundling gives you some significant advantages:
- Minifying is always a net gain
- One or two big files are easier to compress than a whole bunch of small files (the only actual advantage of using lots of small files is better caching opportunities)
- There is still some server overhead for the extra resource requests
- Fetching a lot of different small files has more impact on the server filesystem, for what that can be worth
Module bundlers usually also offer a few extra perks, that for some people entirely justifies always using one:
- Use of CSS pre-processors (mostly SASS and LESS), also more CSS tooling like autoprefixing (automatically adding browser specific prefixes for maximum compatibility)
- Use of Typescript or another language that compiles to JavaScript
- Use of transpiling (Babel)
- Processing or inlining of static assets that are not JS or CSS: includes templates, images (can minify images), JSON, ...
- Dynamic module imports
- Cache busting features
- Code linting
- Hot reload / Auto-compilation of static assets
Existing module bundlers
In the Node ecosystem we mainly got these four:
- Webpack — Has the steepest learning curve but is used by a lot of big projects including create-react-app and the Vue CLI
- Parcel.js — The bundler we're going to feature in the article. Its main selling point is that it doesn't have a main config file and is very easy to just install and use
- Rollup.js — Lightweight bundler, popular to compile JS libraries but can also be used for larger projects
- Browserify — One of the earliest bundlers which had the main goal of helping you use CommonJS and Node packages on the browser - Heavily fell out of grace but is still mentioned in a lot of web discussions
The main idea is always the same: you provide the bundler with an entry point (usually a .js file) that has all the imports for all the modules required for your app. The bundler then creates a dependency graph and outputs a bundle containing all the module code packed and linked together.
Webpack heavily relies on plugins and loaders which are a big ecosystem of their own. The configuration file tends to get pretty big even on small projects.
We have used Webpack on the previous article about our no-dependencies lightweight PHP setup project, mainly because we wanted to rely on some of its configurable features for cache busting but please have a look on that project after reading this article if you're interested in going deeper into module bundlers.
In my opinion, the most straightforward bundler to use today which also offers easy access to the most powerful features (SCSS, Typescript etc.) is Parcel.js and we'll try to sell you on how easy it is to add to your project, as this would translate to any backend language.
Requirements
You need Node.JS installed as well as the Node Package Manager, which is the npm CLI command (npm is included in most Node.JS setup packages).
Parcel (and module bundlers in general) use a significant amount of disk space (about 100MB) which can add up if you're installing it locally to a lot of projects.
We like to install it globally and then use it through npx in projects.
With Node.JS installed we can immediately install Parcel globally:
npm install -g parcel-bundlerUsing Parcel with Spring Boot
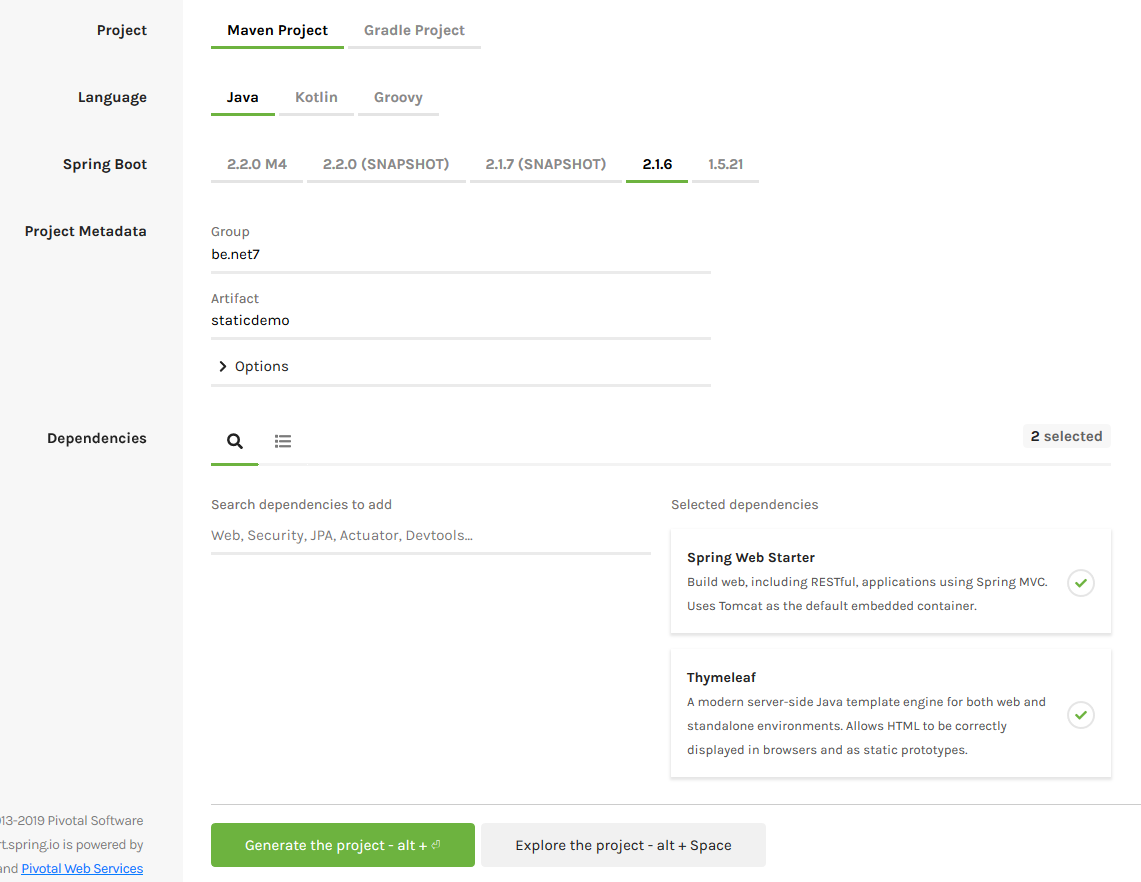
We'll be using Java for the project and generate the base template through the Spring initializr page.
We used the following settings (we added Web starter and Thymeleaf):
To add module bundling to the project, first extract and open it with your editor of choice.
If you want to follow along using the already built example project, you'll find it on this Github repository. Make sure to read on to the section about the npm scripts if you're on Windows.
Changes to .gitignore
The project comes with a pre-generated .gitignore file. We just need to add the node_modules (Node.JS) and .cache (Parcel) directories to it:
node_modules
.cache
Create the source static assets
The bundler will generate the production assets for us, but it needs source files to do so (the so called entry points).
We chose to create these in the /src/main/resources/src (which needs to be created as well):
- main.js
- main.css
Do note we could have put the CSS file in a styles or css directory and we could have used a .scss file. Actually we could also have used a .ts file and Typescript and it would also work out of the box with Parcel.
The .NET Core project will show how to use SCSS. For the current one we just used a single regular CSS file.
You have to reference that CSS file inside the main entry point (main.js), which in turn looks like so:
import './main.css';We're using JS modules here but you can use CommonJS and require instead.
We can already create the destination directory for production assets, which is going to be src/main/resources/static/assets. That choice being motivated by src/main/resources/static becoming available at the root of the embedded Tomcat server of the deployable Spring Boot application when we publish it.
Now let's create a test template in src/main/resources/templates/index.html:
<!DOCTYPE html>
<html lang="en">
<head>
  <meta charset="UTF-8">
  <meta name="viewport" content="width=device-width, initial-scale=1.0">
  <meta http-equiv="X-UA-Compatible" content="ie=edge">
  <link rel="stylesheet" th:href="@{/assets/main.css}">
  <title>Test page</title>
<body>
  <img th:src="@{/icon.png}" alt="Net7 Logo">
  <h1>Welcome!</h1>
  <button id="btn">Add line</button>
  <script th:src="@{/assets/main.js}"></script>
</body>
</html>
We're referencing the script src and CSS file href through the "/assets" directory.
Ready the project to use Parcel
We need to be able to use npm, even though Parcel itself is installed globally on our system (see the Requirements section above). This is achieved through issuing the following command at the root of the project directory:
npm initSince we're going to use npm to run and build the project, we also want the package concurrently to easily run Parcel and the Spring Boot dev server simultaneously:
npm install -D concurrentlyNow let's prepare our npm scripts. Edit the package.json file to have a scripts section such as the following:
"scripts": {
  "watch": "npx parcel watch src/main/resources/src/main.js -d src/main/resources/static/assets --public-url /assets",
  "build-assets": "npx parcel build src/main/resources/src/main.js -d src/resources/static/assets --public-url /assets",
  "build": "npm run build-assets && mvnw clean package",
  "dev": "concurrently -k \"npm run watch\" \"mvnw spring-boot:run\""
}
We can now use:
- npm run dev — Runs Parcel in watch mode and starts the Spring Boot server — This will automatically recompile the JavaScript and CSS when you edit the sources
- npm run build — Packages your Spring Boot application, in our case in a jar with the embedded Tomcat
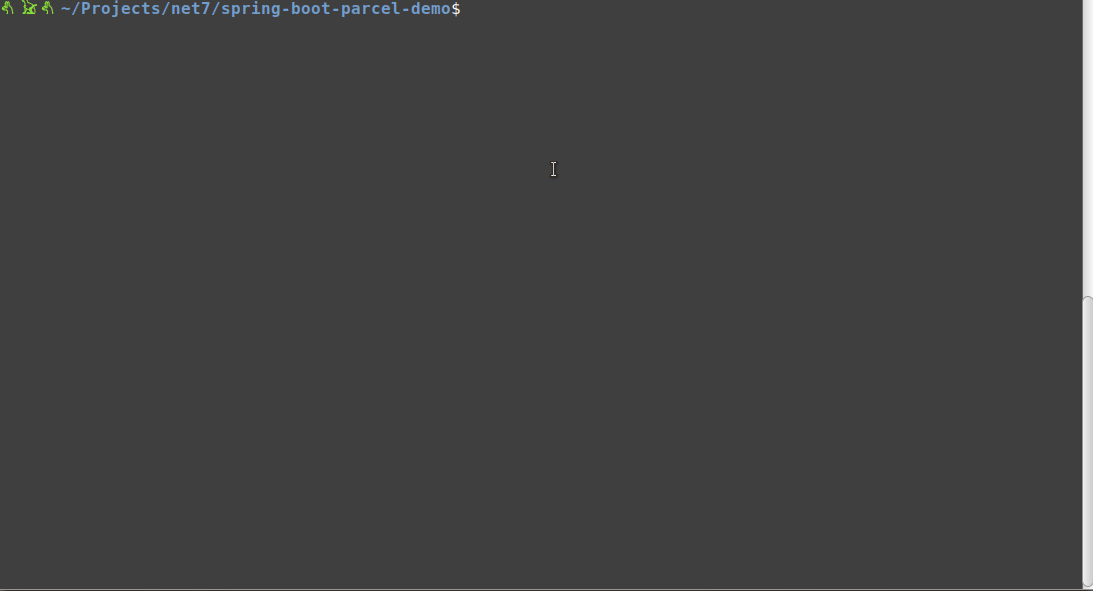
Parcel and the Java server will be kept running with the app available on port 8080:
Note about Windows: That setup won't work on Windows, the quickest workaround is to just edit package.json and change all the occurrences of ./mvnw to mvnw.
The --public-url argument we give to Parcel serves to indicate the assets are not going to be served at the root of the web server but somewhere else (in /assets). The bundling will still work without this but source maps may not work in development mode.
If you build the project, you'll notice that the files generated in src/main/resources/static/assets are minified, whereas they are not when you use npm run dev.
Running parcel build automatically sets the production settings and also transpiles ES6 for you with no configuration required, which means you don't need a .babelrc.
If you do need more precise transpiling settings, for instance to support React's JSX, you can just create a .babelrc file and Parcel will pick it up and use it. Yes, it's that easy.
Bonus: cache busting
It's very easy to make it so that Spring Boot will add a version string to your assets in the Thymeleaf template we wrote before.
Because we're using the special attributes th:src and th:href, the URLs are going through the Servlet chain for processing.
You just have to add the following lines to application.properties:
spring.resources.chain.strategy.content.enabled=true
spring.resources.chain.strategy.content.paths=/**
Now start the dev server using npm run dev and have a look at the source, you should see the version strings:
<!DOCTYPE html>
<html lang="en">
<head>
  <meta charset="UTF-8">
  <meta name="viewport" content="width=device-width, initial-scale=1.0">
  <meta http-equiv="X-UA-Compatible" content="ie=edge">
  <link rel="stylesheet" href="/assets/main-67b21b12b782081e605646315e2aa809.css">
  <title>Test page</title>
<body>
  <img src="/icon-835bade2023f6506972b95ef4af3a112.png" alt="Net7 Logo">
  <h1>Welcome!</h1>
  <button id="btn">Add line</button>
  <script src="/assets/main-3243fb989e360e956aa4866895af00bb.js"></script>
</body>
</html>
Anytime the assets file content changes, the hash will change too and clients will know to request for the new version of the file.
Using Parcel with .NET Core
The process is going to be very similar to what we did with Spring Boot and as such I might provide less details.
Let's start with a project template available from the .NET CLI that's centered around Razor pages.
We used version 2.2.300 for this example.
If you want to follow along you will need to download and install the .NET Core SDK.
We just created a directory and ran:
dotnet new razorThe example project can be found here.
Create a .gitignore file
The template does not have one. We're using this one:
*.swp
*.*~
project.lock.json
.DS_Store
*.pyc

# User-specific files
*.suo
*.user
*.userosscache
*.sln.docstates

# Build results
[Dd]ebug/
[Dd]ebugPublic/
[Rr]elease/
[Rr]eleases/
x64/
x86/
build/
bld/
[Bb]in/
[Oo]bj/
msbuild.log
msbuild.err
msbuild.wrn

# More
node_modules
.cache
wwwroot/assets
.vscode
Ready the project to use Parcel
We need to initialize a package.json file and install concurrently, exactly as we did for Spring boot:
npm init
npm install -D concurrently
We're doing it first this time around because we need npm to install something in the next step. Keep in mind the npm scripts won't work until we create the source assets and output directory.
Edit package.json and add the following scripts:
"scripts": {
  "watch": "npx parcel watch src/main.js -d wwwroot/assets --public-url /assets",
  "build-assets": "npx parcel build src/main.js -d wwwroot/assets --public-url /assets",
  "build": "npm run build-assets && dotnet publish",
  "dev": "concurrently -k \"npm run watch\" \"dotnet watch run\"",
  "test": "dotnet test"
}
By the way there is no caveat about Windows for this project, the scripts will work on any platform.
As with the Spring Boot project, the two main scripts are:
- npm run dev — Runs Parcel in watch mode and starts the .NET Kestrel server in watch mode (will recompile the assemblies on code change) — This will automatically recompile the JavaScript and CSS when you edit the sources
- npm run build — Publishes your application (all the files should be in \bin\Debug\netcoreapp2.2\publish), you might need to provide a target platform in the .csproj file
As we do not use IIS for hosting .NET Core projects we want to edit the .csproj file to change the hosting model:
<AspNetCoreHostingModel>OutOfProcess</AspNetCoreHostingModel>Create the source static assets
Create a src directory at the root of the project in which we'll add the main entry point for the bundler. The choice of using "src" is totally arbitrary.
Inside of src we create a "css" directory with a SASS file called "main.scss", and a file called "main.js" which is going to be the main entry point.
The original Razor pages template includes Bootstrap and JQuery. We're going to keep these around for the exercise but we'll be:
- Installing Bootstrap and its dependencies using npm
- Use the SCSS imports for Bootstrap to enable more customization
From the project root, install Bootstrap:
npm install -D bootstrap jquery popper.jsOpen "main.js" and import our SCSS file and Bootstrap (which imports the JavaScript for Bootstrap only (also includes JQuery)):
import './css/main.scss';
import 'bootstrap';

console.log('App. loaded.');
We could import the SCSS for Bootstrap from "main.js" as well but since we're using SCSS we can use the more adequate @import command in css/main.scss:
@import 'node_modules/bootstrap/scss/bootstrap';Little sidenote here: this imports the whole of Bootstrap. Using SCSS you can pick and choose only the modules you're using which would reduce the size of the final bundle.
Let's leave the source assets and create the wwwroot/assets directory to be the destination of the bundled files generated by Parcel.
That directory is actually not part of the published project by default, we need to edit the .csproj and include it like so:
<ItemGroup>
  <Folder Include="wwwroot\" />
</ItemGroup>
Edit the layout template
The Razor pages template uses a template as the layout for all the pages.
The file is at Pages/Shared/_Layout.cshtml.
If you have a look at the original one you'll see there are <environment> tags that decide whether to import the static libraries that are in wwwroot/lib or URLs from a CDN.
We can get rid of all of that and just import the future files to be generated in wwwroot/assets.
Namely we're using the following link tag:
<link rel="stylesheet" asp-append-version="true" href="~/assets/main.css" />And the following script tag at the end of body:
<script src="~/assets/main.js" asp-append-version="true"></script>Bonus: cache busting
It's already enabled.
We used a simple solution which is to add an argument to the link and script tags inside of _Layout.cshtml:
asp-append-version="true"You can now test the app on port 5000 using npm run dev.
Code splitting
The article is already too long for its own good, but we wanted to touch briefly on code splitting.
The thing is, having one big bundle is great for compression and overall server overhead, but it's not great for caching, because for every single small change of your JS client code, the whole bundle will have to be downloaded by all of your clients.
There is a common practice in bundling which is to split the "libraries" from your actual application code.
For instance, in the case of the .NET test project, we would put Bootstrap, JQuery, etc. in their own bundle, and add another bundle for our code.
In that situation, we have the library bundle that is unlikely to change, and can be cached by clients for great benefits. The gain from such a tactic is especially significant when you're using a lot of client-side libraries.
The simplest way to achieve that basic code splitting with Parcel is to have more than one entry point. For our test projects we had "main.js", but we can provide Parcel with more than one of these.
We could have a "lib.js" files with the Bootstrap import, and just add it to our parcel commands in package.json. For instance:
"build-assets": "npx parcel build src/main.js src/lib.js -d wwwroot/assets --public-url /assets",Where we just gave another .js file to the parcel command.
You could also split CSS this way by having some CSS imports in the "lib.js" file and the others in "main.js".
Conclusion
We hope to have demonstrated that you don't need a ton of requirements and complex configuration to get module bundling including extra features like SCSS or TypeScript in your existing backend project.
The basic idea is always the same and is also a good gateway to eventually trying out Webpack or using a frontend library.
You can also transfer your static assets processing logic over to any new backend technology when you understand the basics of it.